How to Set Up a Floating Floyd Rose: String Change, Spring Tension and Fine Tuning
Everything we tell players at the Karimer counter about restringing and balancing a floating Floyd Rose at home, in the order that actually works.
A floating Floyd Rose is a balance. The strings pull one way and the springs in the back cavity pull the other. The bridge hangs on two knife edges in between. Once you understand that, a string change stops being scary. It becomes a sequence, and the sequence matters more than any single trick.
This is the order we walk players through at the counter. It is built on the Floyd Rose factory instructions and troubleshooting notes, plus a few tech guides that agree with them. Where a source gave no number, we did not invent one.
What you need on the bench
- The hex wrenches for your saddle blocks and nut clamps (the ones that came with the bridge).
- Wire cutters for the ball ends.
- Something firm to block the bridge. A trem block or a piece of folded cardboard both work.
- An electronic tuner.
- A screwdriver for the spring claw screws in the back cavity.
Step 1: Block the trem before you touch a string
The bridge floats because string pull and spring pull are equal. Take tension off the strings and the springs win, so the bridge dives back toward the body. Every string you then put on has to fight that.
So before anything else, push the bridge to roughly its level position and wedge something firm under the back edge of the baseplate so it cannot sink. Some techs use the removed backplate wrapped in cloth, others use a trem block made for the job. Either way, the baseplate stays roughly parallel to the body while the strings are off.
You can still do the job without the block, but you will be rebalancing the whole bridge from scratch afterwards.
Step 2: Change one string at a time
Even with a block in place, swap strings one at a time. Blackstar's restringing lesson puts it plainly: restring one at a time to keep some level of tension on the bridge. Taking all six off at once means the bridge has to be fully rebalanced, and the small saddle insert blocks can fall out of the saddles once the strings are gone.
The exception is a full setup or a gauge change. Then take them all off, but keep the bridge blocked and put a strip of painter's tape across the saddles so the insert blocks stay put. Painter's tape comes off clean, duct tape does not.
Step 3: Cut the ball end and lock at the saddle
The original Floyd Rose manual says it in one line: if you are using standard strings, remove the ball ends with wire cutters. Floyd Rose sells strings with no ball end, but ordinary sets work fine once trimmed.
Cut just above the ball, so the winding around it comes off with it and you are left with plain wire. Loosen the saddle's string lock screw a few turns, but do not remove it, or the insert block can drop out. Feed the string into the saddle from the top, seat it against the insert block, and tighten the lock screw with the hex wrench until a firm tug will not pull the string out.
Firm is the word. The screw only has to pinch the string against the block. Go past that and you strip the screw or crush the string.
Step 4: Route to the tuners and tune close
With the nut clamps loosened or removed, the string runs over the locking nut, under the string retainer bar, and onto the tuning key. Tune it close to pitch, give it one good stretch, and check the bridge is still sitting level before you move to the next string. Then repeat for the other five.
Floyd Rose's own tuning instructions say adjusting one string changes the others in the opposite direction, so you will go around the set several times. Tune low to high, then start again, and keep going until a full pass changes nothing.
Step 5: Set the baseplate parallel with the spring claw
Now pull the block out. This is where most home setups go wrong.
Look at the bridge from the side. Floyd Rose's troubleshooting page says the baseplate should sit parallel with the top surface of the guitar. If it does not, the fix is in the back cavity, not on the tuners.
- If the bridge tilts forward, toward the pickups, the strings are winning. Turn the two claw screws clockwise to tighten the springs, then retune.
- If the bridge tilts back, toward the body, the springs are winning. Turn the claw screws counterclockwise to loosen them, then retune.
- Repeat until the plate is level and the guitar is in tune at the same time.
Make small turns and keep the two screws roughly even so the claw stays square. Every claw adjustment changes the tuning, and every tuning change moves the bridge, so expect a few rounds.
Two springs or three?
The bridge only cares about total pull. You can reach the same balance with two springs and the claw screwed further in, or with three springs and the claw backed out. The tech guides we checked treat three springs as the normal starting point for 9s and 10s in standard tuning, with a fourth for heavier gauges or lower tunings.
Fewer springs, screwed in tighter, give a softer feel under the arm and a bigger change in pitch for the same movement. More springs feel stiffer and settle faster. If you change string gauge, revisit the spring count or the claw, because the balance has moved. Get the plate parallel first and worry about feel second.
Step 6: Center the fine tuners, then lock the nut
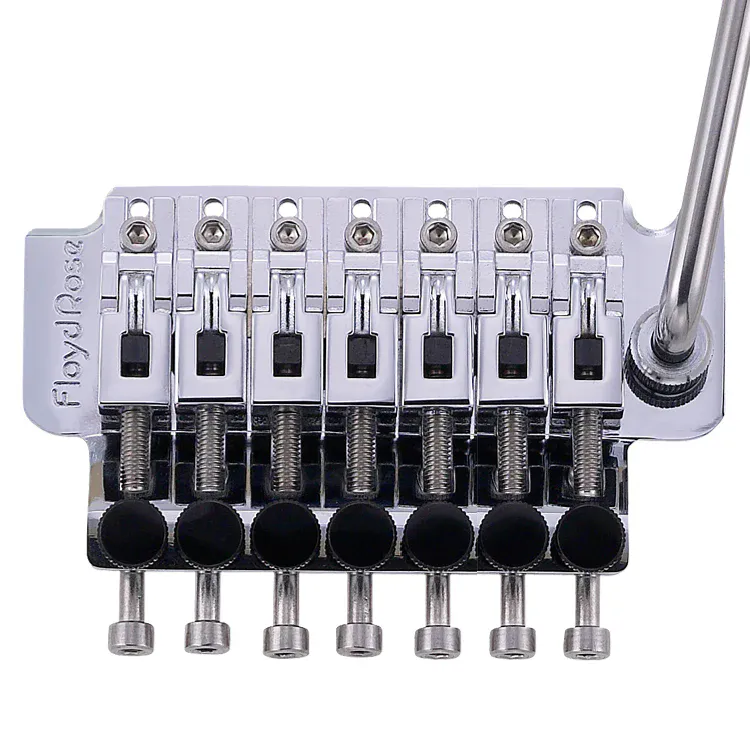
Here is the part people skip. Before you clamp the nut, the fine tuners on the bridge have to be sitting in the middle of their range. Floyd Rose's instructions say to set the fine tuner screws to the middle of their adjustment before tuning at the headstock. Halfway in leaves room to go sharp or flat after the nut is locked.
Once the guitar is in tune, the bridge is level and the fine tuners are centered, clamp the three nut pads down with the hex wrench. Snug is enough, you are not trying to crush anything. The factory manual says one stretch per string is enough before locking, so do not wrestle the strings for ten minutes.
Clamping the nut usually nudges a string or two slightly. That is normal. From here on you only touch the fine tuners, until the next time you unlock the nut.
If a fine tuner runs out of travel, do not force it. Unlock the nut, center the fine tuners again, retune at the machine heads and lock again.
Step 7: Set the arm collar
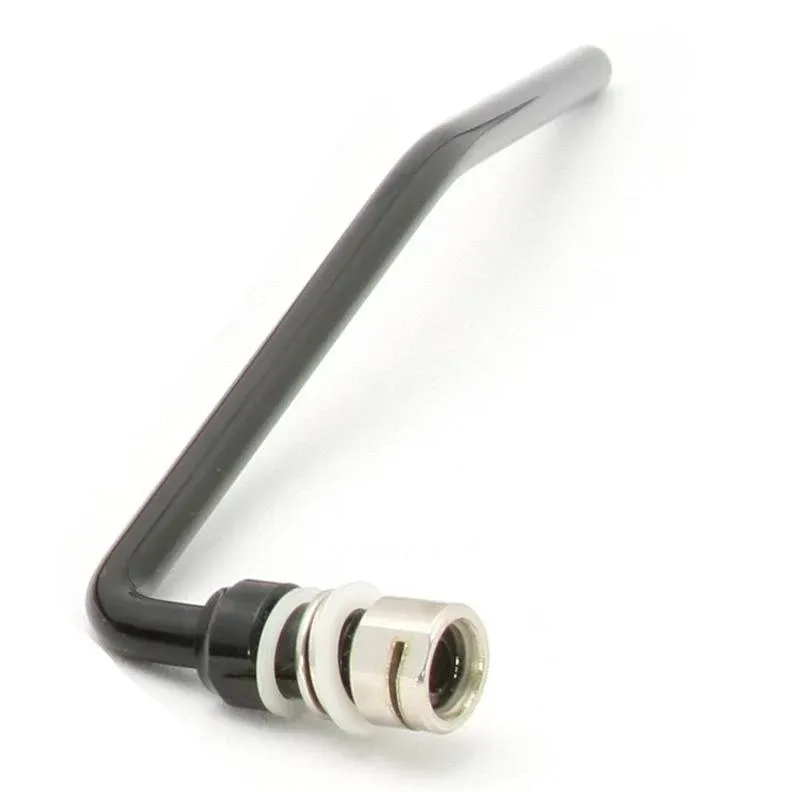
Most current Floyd Rose bridges use a push in arm with an adjustable collar. The collar sets how much drag the arm has, so it can either swing freely or stay where you leave it. On the push in style arm Floyd Rose says the tension is adjusted with a 2 mm hex wrench, which is not included with the arm.
Set it so the arm stays out of your way when you are not using it but does not need two hands to move. Check it after a gig or two, because a collar that works loose lets the arm flop.
The mistakes we see most
Nut clamped before the guitar was in tune
Someone clamps the nut, then tunes at the headstock, then wonders why the strings will not hold. Once the nut is locked, the tuning keys do nothing useful. Tune first, lock second, then correct with the fine tuners.
Fine tuners bottomed out
If the fine tuners are screwed all the way down before the nut is locked, there is nowhere left to go. Unlock, center them, retune at the headstock, relock.
Stripped saddle string lock screw
These screws are small and a hex wrench puts a lot of force on them. If one has stripped, the screw or the saddle needs replacing depending on which side gave up. The genuine string lock screws are an M4 x 0.7 thread, and Floyd Rose sells heat treated stainless versions meant to resist stripping. We keep genuine Floyd Rose parts on the shelf, lock screws and insert blocks included, in our Floyd Rose section. Do not tap the saddle for a bigger screw; the larger head may not clear the baseplate.
Bridge not parallel
A bridge that sits tilted still plays, but the arm will only work well in one direction and the tuning wanders. If the plate is not level, it is the claw, and only the claw.
Loose nut or loose saddle screws
Floyd Rose's troubleshooting list says to make sure the nut attachment screws are tight, the string clamps at both the nut and bridge are tight, and the saddle intonation screws are tight. Loose hardware anywhere in that chain shows up as bad tuning.
Licensed bridge, original expectations
Floyd Rose notes that licensed bridges are not under their quality control. A budget licensed unit with soft knife edges will not hold tune the way an Original does, no matter how careful the setup.
A quick order of operations
- Block the bridge level.
- Loosen or remove the nut clamps.
- One string at a time: cut ball end, lock at the saddle, route under the retainer bar, tune close, stretch once.
- Remove the block. Tune low to high in passes until nothing moves.
- Level the baseplate with the claw screws. Retune. Repeat.
- Center the fine tuners, then lock the nut.
- Touch up with the fine tuners only.
- Set the arm collar.
Follow that order and a string change on a floating Floyd is a short job once you have done it twice. Skip the block or lock the nut early and it takes the whole evening.
If you need springs or a full genuine Floyd Rose bridge, we stock them as an authorized US dealer. Have a look in the shop, and if you are not sure which part fits your bridge, ask us before you order.
Sources
- https://www.floydrose.com/blogs/tech-talk/string-tuning-instructions
- https://www.floydrose.com/blogs/tech-talk/troubleshooting-tips
- https://www.floydrose.com/blogs/tech-talk/vintage-setup-instructions (Vintage Floyd Rose Setup Instructions PDF)
- https://www.floydrose.com/products/frtapi
- https://www.floydrose.com/blogs/news/floyd-rose-upgrade-guide
- https://blackstaramps.com/lessons/how-to-restring-a-floyd-rose-tremolo/
- https://www.gearnews.com/how-to-change-strings-floyd-rose/
- https://theguitarplugged.com/article/how-to-restring-a-floyd-rose
- https://www.beyondeleven.com/blog/floyd-rose-setup-guide/
- https://www.strangeguitarworks.com/floyd-rose-tips-and-tricks/
- https://www.stewmac.com/parts-and-hardware/bridges-and-tailpieces/bridges-and-tailpieces-for-electric-guitar/floyd-rose-tremolos/floyd-rose-string-locking-screws/