Why Guitar Output Jacks Crackle and Cut Out, and How to Fix It for Good
A workshop guide to diagnosing a guitar output jack that crackles or cuts out, from the wiggle test to a clean solder job on the replacement.
The cheapest part on the guitar causes the most panic
Every week someone walks up to the Karimer counter with the same story. The guitar sounded fine at soundcheck, then halfway through the set it started crackling, and by the encore it cut out every time they moved. They are ready to blame the amp, or sometimes the whole guitar.
Most of the time the culprit is a part that costs less than a set of strings. The output jack is the one connection on the instrument that gets plugged, stepped on, and yanked night after night. It fails in predictable ways. Once you know them, you can find the problem in a couple of minutes and fix it properly.
How a standard open jack actually works
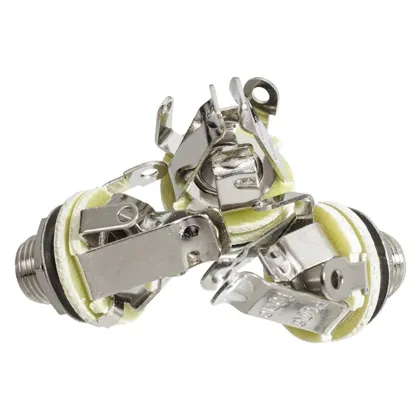
The classic open frame 1/4 inch jack on most electric guitars is a simple device. A threaded metal bushing takes the plug, and that bushing is the ground. Premier Guitar describes it plainly: a mono jack has two lugs, ground attached to the case and the hot lead connected to the bent flange that contacts the cable tip.
So your entire signal path runs through two pressure points, the tip spring against the plug tip and the plug shaft against the inside of the bushing. There is no latch and no clamp, only spring tension and friction.
The reference design here is the Switchcraft #11, the open frame jack that has been the factory choice for decades. Switchcraft rates it for 10,000 cycles at a 7 lb operating force. Contact resistance is 0.03 ohm, the tip spring is nickel silver, and the bushing is nickel plated copper alloy.
Where it fails
A few things go wrong, and they usually go wrong together.
First, the tip spring loses tension. Every plug that goes in bends that spring outward. Over years the metal relaxes and the pressure on the plug tip drops. The contact area shrinks, and any movement of the cable breaks the connection for a split second. That is your crackle.
Second, the contact surfaces oxidize. An oxidized contact still works when the cable sits perfectly still, which is why the problem shows up on stage and not in the bedroom.
Third, and this is the one that strands people, the retaining nut works loose. The jack body then rotates inside the guitar every time you plug in, and the wires soldered to the lugs twist until one of them, almost always the ground, breaks off. On Telecasters, StewMac points out that the retainer clip inside the body loosens from stress on the jack, and you get popping and an intermittent signal even when the outer nut is tight.
Testing it in two minutes
Do not open anything yet. Plug in, turn the amp up a little, and run these checks in order.
- Start with the wiggle test. Gently wiggle the cable at the guitar end and listen. If the noise follows the movement, the problem is at that connection. Do the same at the amp end. If the noise follows you there, it is the amp jack or the cable.
- Next, try a second cable you trust. Plugs wear too. If the second cable fixes it, you still have a marginal jack, but the cable was the trigger.
- Then check for rotation. Grab the plug and try to turn it. If the jack turns with it, the nut is loose.
- Finish with a continuity check if you have a multimeter. Plug in a cable and check from the far plug tip to the hot lug, then from the far plug sleeve to the ground lug. Wiggle while you test. A beep that stutters is a failing contact. No beep on the sleeve side almost always means the ground wire has snapped off.
Quick fixes that hold up
Bend the tip contact back
If the plug feels loose or falls out easily, the tip spring has relaxed. Unplug, look into the jack, and use a small screwdriver or needle nose pliers to bend the spring a little toward center. Go slowly and test after each bend. Make sure the spring cannot touch the bushing, because that is a dead short and you will hear nothing at all. This buys months on a decent jack.
Clean it
Blow the jack out with compressed air, then plug a clean cable in and out a dozen times. If you use contact cleaner, pick a product meant for electronics, put a small amount on a cable tip rather than spraying into the guitar, and let it dry fully before playing.
Tighten the nut the right way
The instinct is to grab the nut with pliers and crank. The problem is that the jack body turns with the nut and twists the wires inside. StewMac's Bullet jack tightener works from the outside: a rubber tip holds the jack steady while a socket turns the nut, which in their words prevents twisting and breaking the delicate solder joints inside the jack. Without the tool, insert a plug, hold it firmly so the body cannot rotate, and tighten the nut with a wrench against it.
When to stop fixing and replace
Replace the jack if the spring has been bent back more than once, if you see green or black corrosion on the contacts, if a lug has cracked or a solder joint has failed, or if the guitar came with a plastic enclosed panel jack. A new part is cheaper than another hour of your time, and it is the only fix that removes the fault instead of postponing it.
What a multi contact jack changes
A standard jack grips the plug at two small points. A multi contact design adds more. Pure Tone describes its patented jack (US Patent 9,680,264) as having dual tension grounds and dual positive tips, which makes four contact points instead of two. The manufacturer also lists 100 percent greater surface area at all contact points, a tensioned design that locks the cable securely in place, and current handling rated at 500 volts. The manufacturer's stated purpose is to end the crackle caused by pressure grounds, the failure mode described above.
We will not tell you what it does to your tone, because that is not our claim to make. What we can say from the counter is that the mechanical logic holds: with more contact points and more spring pressure, a single worn spot or a moving cable is less likely to open the circuit. Karimer stocks the full Pure Tone line as an authorized dealer, in mono and stereo and in nickel, gold, or black nickel, at our Pure Tone jacks page.
Mono or stereo: it matters for active pickups
If your guitar has passive pickups, a mono jack with two lugs is all you need. If it has active pickups or an onboard preamp, you need a stereo jack, and not for stereo sound. The third lug, the ring, is the battery switch. Seymour Duncan puts it simply: active pickups already use a stereo jack as a switch for the battery. A normal mono cable's sleeve bridges the ring and sleeve contacts and completes the battery ground, which powers the circuit. Unplug and the battery disconnects.
That has two practical consequences. Replace an active guitar's jack with a mono jack and the battery either never connects or never disconnects. Leave a cable plugged in overnight and the battery drains. Wire it as Seymour Duncan's hardware pack diagrams show: pickup output to tip, battery black lead to ring, ground to sleeve.
Barrel jacks on Strats and acoustics
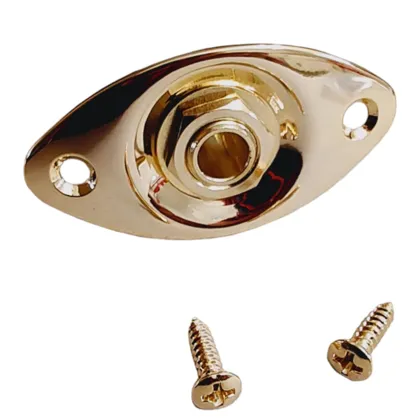
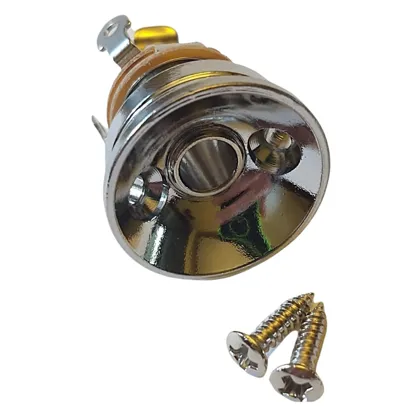
Not every jack is an open frame design. Acoustic electric guitars use a barrel or endpin jack that passes through the tailblock from inside the guitar and is secured outside with a nut and a threaded strap button. Some Strats and many modern electrics with a jack mounted on the side use a barrel jack too. They fail the same way, with one extra twist: as the strap button loosens over years of gigs, the whole assembly can drop inside the body, washer and nut included. Pure Tone's barrel jack, available for mono and stereo use, has a 35 mm threaded shaft and a 40 mm overall length, so check that against your tailblock thickness before ordering. We keep those on the shelf at the Karimer shop as well.
Soldering the replacement
This is a fifteen minute job on most guitars and a good first soldering project.
- Use a 40 watt iron or a temperature controlled station.
- Before you unsolder the old jack, take a photo of which wire goes to which lug. On a Switchcraft the hot lug has small notches on either side and the ground lug has straight edges.
- Heat the work, not the solder. Put the iron on the lug and wire together, then feed solder from the opposite side. When it flows on its own, pull the iron away and hold the wire still until the joint goes from shiny to dull.
- Reversing hot and ground is the most common mistake, and it gives you either silence or a loud hum. Check it against the photo twice.
- Install the jack, tighten the nut with the body held still, and run the wiggle test before you screw the plate back on.
If this sounds like more than you want to take on before a show, a repair shop can do it in the time it takes to restring. Either way, a good jack installed properly should be the last time you think about that connection for years.
Sources
- https://puretonetechnologies.com/products/pure-tone-multi-contact-1-4-output-jack
- https://puretonetechnologies.com/products/pure-tone-multi-contact-1-4-barrel-jack
- https://stompboxparts.com/audio-jacks/1-4-ts-open-jack-11/
- https://www.amplifiedparts.com/products/14-jack-switchcraft-11-mono-open-frame-open-circuit
- https://www.stewmac.com/video-and-ideas/trade-secrets/how-to-fix-a-noisy-jack-in-a-telecaster/
- https://www.stewmac.com/luthier-tools-and-supplies/tools-by-job/tools-for-electronics/bullet-guitar-jack-tightener/
- https://www.premierguitar.com/diy/guitar-shop-101/guitar-jack-wiring
- https://www.seymourduncan.com/blog/latest-updates/active-and-passive-in-the-same-guitar-can-it-be-done
- https://www.seymourduncan.com/single-product/active-pickup-installation-hardware-pack
- https://www.homeoftone.co.uk/blogs/news/how-to-guide-wiring-your-guitars-jack-mono-socket
- https://ironageaccessories.com/blogs/iron-age-general-blog/guitar-jack-not-working